
Sending emails via Azure Communication Services SMTP
There are many situations where it is helpful to get a message from your active pipelines. These may include logs, summaries of successful completion, or possibly even an integration with downstream systems.
CloverDX provides the EmailSender component to address this need. It uses the standard Simple Mail Transfer Protocol (SMTP) and is capable not only of sending messages but also of transferring multiple attachments. But first, it needs to be configured to do so.
Where previously one would just configure the SMTP server locally, these days cloud-based options are more often used. For this article, we will use Azure Communication Services (ACS) as the authorization server to enable our CloverDX graph to send emails via SMTP. ACS offers tools for adding communication features like voice, video, chat, SMS, and email to applications. They are part of the Azure ecosystem and can be managed via the Azure Portal.
This article will first explore the emailing permissions offered by Azure, before providing a step-by-step guide to configuring both the Azure and CloverDX sides of sending emails. In some future article, we may also have a closer look at the reading aspect.
Types of ACS permissions
There are two main categories of permissions offered by Azure Communication Services for two distinct types of apps:
- delegated
- application
Some APIs offered by ACS support both types of permissions, while others support only one of the two.
Delegated
Delegated permissions are used by user-dependent apps. They act on behalf of a user within specified scopes. Email clients or social media schedulers fall into this category.
Their authorization follows the OAuth 2.0 authorization code flow, where the user grants the application permission to access specific resources through the authorization server. It is the so-called “3-legged OAuth” as there are three parties involved: user, application, and server. Admin consent may or may not be required, depending on the permission type granted to the application.
Available delegated permissions for emailing
- IMAP.AccessAsUser.All – reading
- SMTP.Send – sending
Application
On the other hand, application permissions are used by user-independent apps. They act independently within their specified app roles. Imagine automatic email archivers running in the background, company-wide notification systems, or scripts used by IT Ops for bulk editing of user permissions.
Their authorization follows the OAuth 2.0 client credentials flow, where the application authenticates with the authorization server using its own credentials. This is referred to as “2-legged OAuth”, as there are only two parties involved: application and server. Due to their much broader powers, all application permissions require admin consent.
Note that what OAuth calls “client” is what Azure calls “application”.
Available application permissions for emailing:
- Mail.Read – reading
- Mail.ReadBasic.All – reading (not body and attachments)
- Mail.ReadWrite – reading, creating, updating, deleting
- Mail.Send – sending
Summary
| Category | Delegated | Application |
| OAuth type | 3-legged | 2-legged |
| Parties involved | user, application/client, server | application/client, server |
| OAuth flow | authorization code flow | client credentials flow |
| Admin consent | depending on permission type | required |
Configuration
As of CloverDX v7.0, only 3-legged OAuth is currently supported natively by the email components, meaning that only delegated permissions can be used when implementing EmailSender or EmailReader components. Application permissions are not supported in these components.
However, application permissions can still be used by implementing a custom solution—for example, by creating a process flow that uses the HTTPConnector component to call the Azure API. In this setup, the graph first connects to Azure to obtain an access token using the application's credentials, then uses that token to send an email through another HTTPConnector.
Let’s now get to the setup of sending emails via delegated permissions in Azure and CloverDX.
Configuration in Azure Portal
- In your web browser, navigate to https://portal.azure.com.
- Select the “App registrations” option in the “Azure Service” section and click on “New Registration”.
- Choose a name and select the “Web” option in the “Redirect URI” drop-down. The value for the “Web” option would be your CloverDX Server URL followed by “/oauth2”, for instance: http://localhost:8083/clover/oauth2

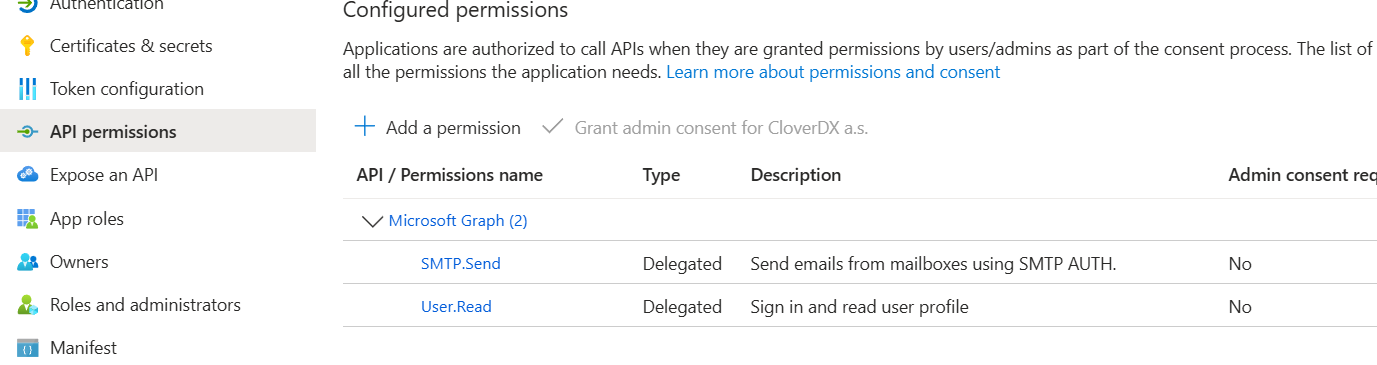
- When the app is created, navigate to “API Permissions” and click on “Add permission”. Go on to choose “Microsoft Graph” and then “Delegated permissions”.
- In the “Select permissions” search, type “SMTP”. The search will bring up a single “SMTP” record that after expanding shows a single record called “SMTP.Send Send emails from mailboxes using SMTP AUTH.” By selecting this checkbox, you will give the app permission to send emails. Select the checkbox and save the changes by clicking on the “Add permissions” button. sentasa
- In the “Certificates & secrets” section, click on “New Client Secret”. Fill in the description and expiration of your choice and click “Add”. Copy the content of the “Value” column. Note: Make sure to do this before switching to a different section because the secret value cannot be retrieved afterwards.
Configuration in CloverDX
- Make sure you’re working in a Server project in CloverDX Designer.
- In the “Outline” pane, right-click “Connections”, then select “Connections” > “Create OAuth2 connection”.
- OAuth2 connections are always externalized in CloverDX. Save the connection into the “conn” directory of your sandbox. Click “Next”.
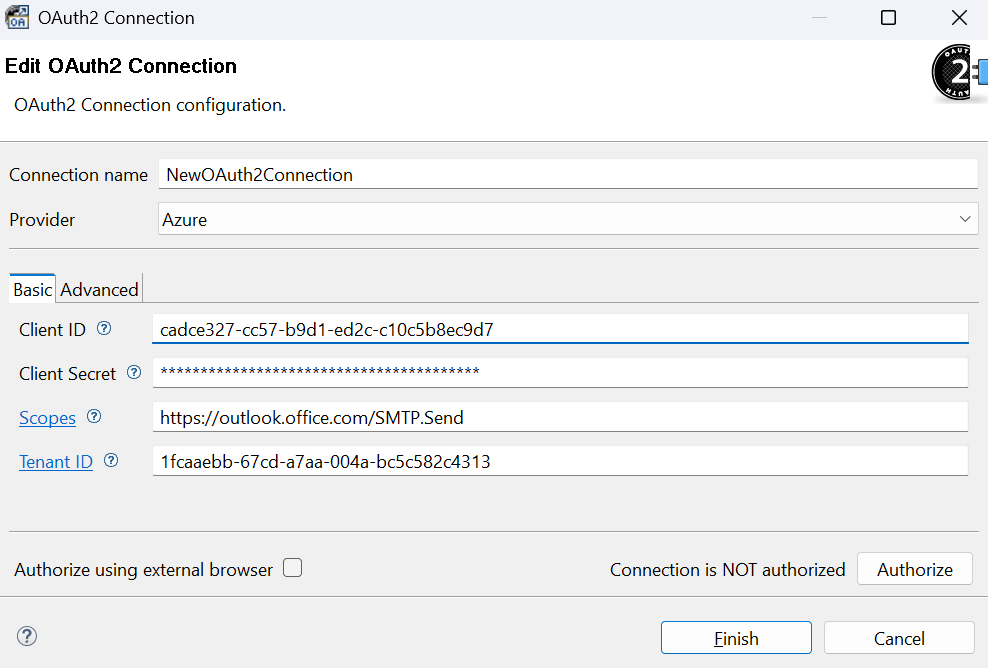
- Change the “Provider” from “Generic” to “Azure”.
- Paste the previously copied Client Secret value from Azure into the “Client Secret” field in CloverDX.
- Fill in the scopes that you previously selected during the app registration in Azure. Make sure to prefix them with “https://outlook.office.com/”. Multiple scopes need to be separated by a space character. For example, if you selected both IMAP and SMTP permissions so that your app can both read and send emails, you would populate the “Scopes” with this value:
“https://outlook.office.com/IMAP.AccessAsUser.All https://outlook.office.com/SMTP.Send”. - To fill in the remaining items from the “Basic” tab, navigate to the “Overview” section in the Azure Portal and go on to:
- Copy the “Application (client) ID” value from Azure and paste it into the “Client ID” field in the Designer.
- Copy the “Directory (tenant) ID” value from Azure and paste it into the “Tenant ID” field in the Designer.
- Switch to the “Advanced” tab and double-check that the “Redirect URL” matches the “Redirect URI” configured in Azure (Authentication > Platform Configurations > Web). If not, adjust the “Redirect URI” in Azure to match the “Redirect URL” in CloverDX.
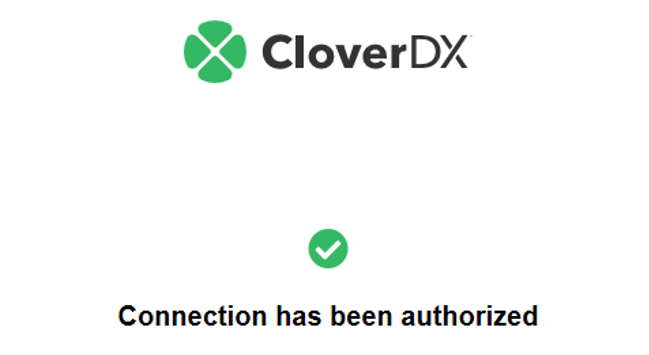
- Click on “Authorize”. This will bring up a login screen; select your account and accept the requested permissions.

- Your connection will be authorized.
- Add the EmailSender component to your graph. Note that it sends an email for each incoming record so in case you want to obtain just one email (e.g., a notification with the count of processed rows after a successful run), also add the Aggregate component before it.
- Consider also adding the Map component to the graph. While you can set up the email directly inside EmailSender, using a separate component to prepare its parts (subject, from, to...) would make your graph more organized. It will also allow you to review the setup by inspecting the edge from Map to EmailSender.
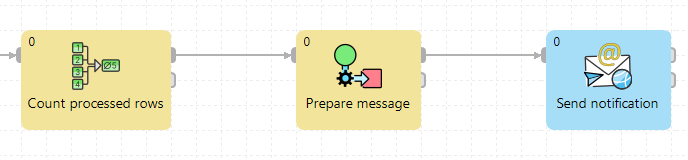
- Set Aggregate to count all processed rows.
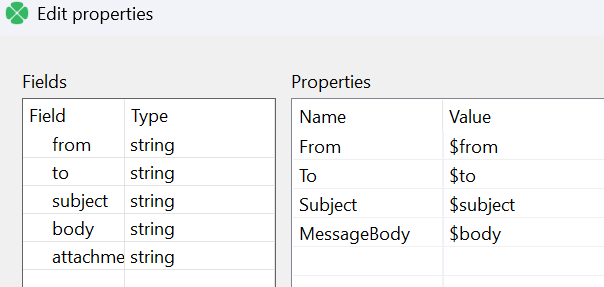
- Set Map to prepare the message. Subject, from, to, and body are required email parts. As you are using delegated permissions, put your own email address in the from field. You can also add the filename to be sent as an attachment here.
- Next, open the EmailSender component and set its Message properties to use the prepared email parts.
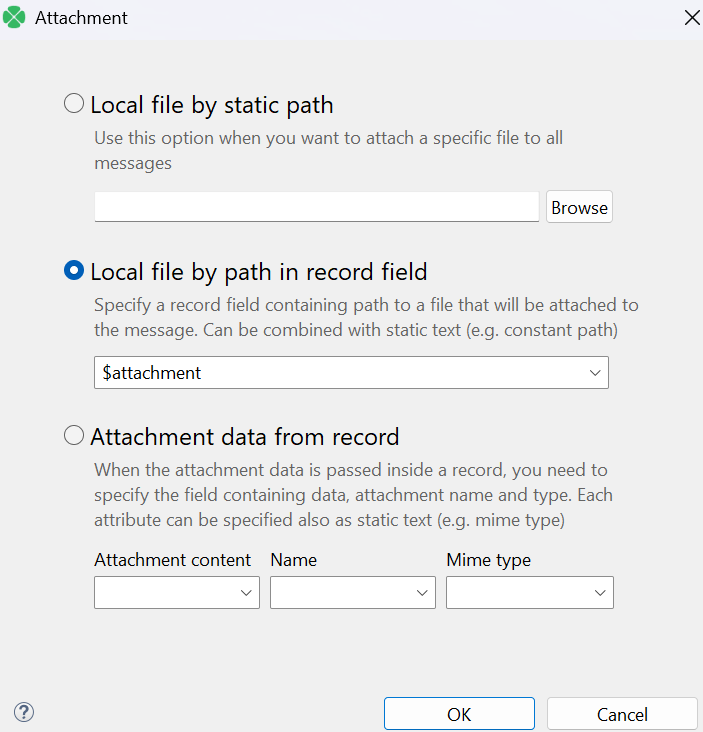
- There are several ways to set up attachments: it can either be a local file or it can be included directly in input data. Here we obtain the path to the sent file via the attachment field prepared in the Map component.

- Finally, configure EmailSender to utilize the newly created OAuth2 connection.
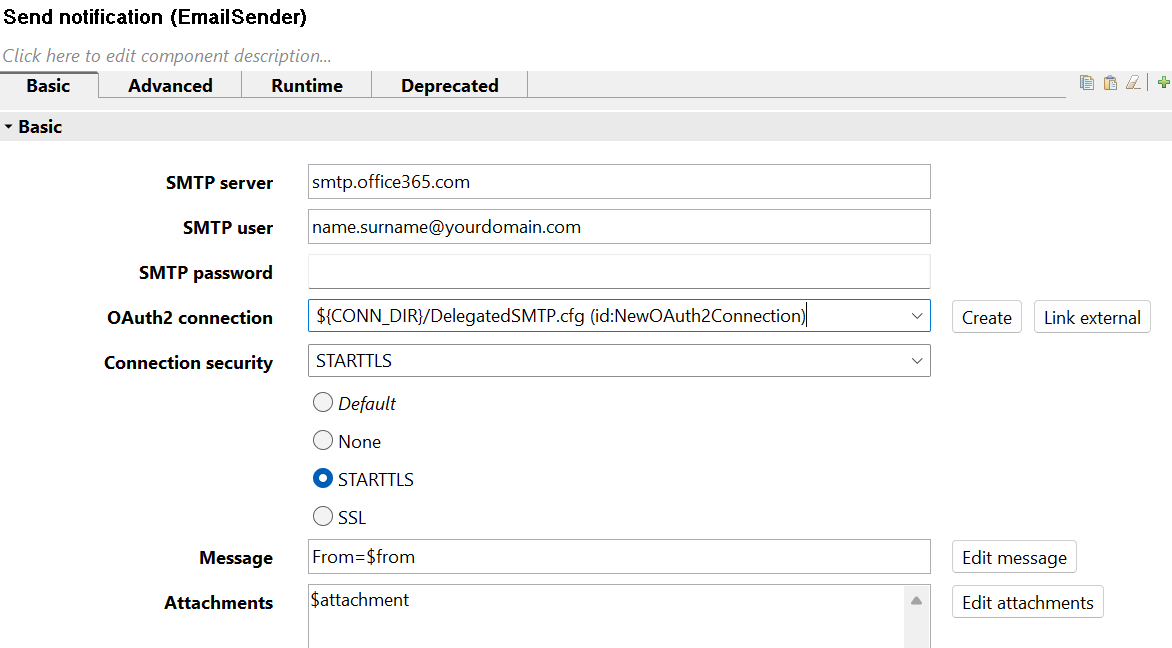
- Voila, your graph should now be able to send email notifications!
- For more details, please consult our docs for EmailSender or Delegated OAuth2 connections.
More from Tech Blog
-
CloverDX Server diagnostics with ChatGPT or Claude via MCP
Administrating a healthy CloverDX Server usually means correlating information scattered across performance logs, job tracking tables, execution logs,... AI -
Data Quality Examples on GitHub
As our first set of examples, we published a project called DataQualityExamples which demonstrates how users can address their data quality issues with... CloverDX How-To -
Introducing CloverDX Examples on GitHub
We’re excited to introduce the CloverDX Examples repository on GitHub. The repository is a growing collection of helpful and practical examples designed to... CloverDX How-To -
Connecting to REST APIs (OpenAPI)
Connecting to REST APIs is a crucial aspect of modern data integration, and the REST Connector in CloverDX provides a streamlined approach. The video below... RESTConnector -
Performance tuning: How to troubleshoot database-related performance issues in CloverDX
Performance is undoubtedly one of the key factors when running data transformations. In this article, we will look at how to troubleshoot database-related... Performance
Visit CloverDX Blog
-
Using large language models in ETL pipelines: Best practices for integrating OpenAI and other LLMs
-
The vital importance of data governance in the age of AI
-
What great data teams stop doing
-
Using AI in CloverDX to speed up data onboarding without compromising data security
-
Troubleshoot your CloverDX server faster with the Support Assistant